Connecting to Your Printer
This guide will help you connect your Ryzer LED controller to your Bambu Lab 3D printer so the LEDs can respond to print status.
How It Works
Ryzer connects directly to your printer over your local network to receive status updates:
- Print progress and state
- Temperature readings
- Error conditions
- Layer information
The LEDs respond automatically based on what your printer is doing.
Before You Begin
Make sure you have:
- ✅ Ryzer connected to your WiFi network (First Time Setup)
- ✅ Bambu Lab printer connected to the same WiFi network
- ✅ Access to your printer’s touchscreen
- ✅ Ryzer web interface open at
http://ryzer.local
Step 1: Find Your Printer Information
You need to gather three pieces of information from your Bambu Lab printer.
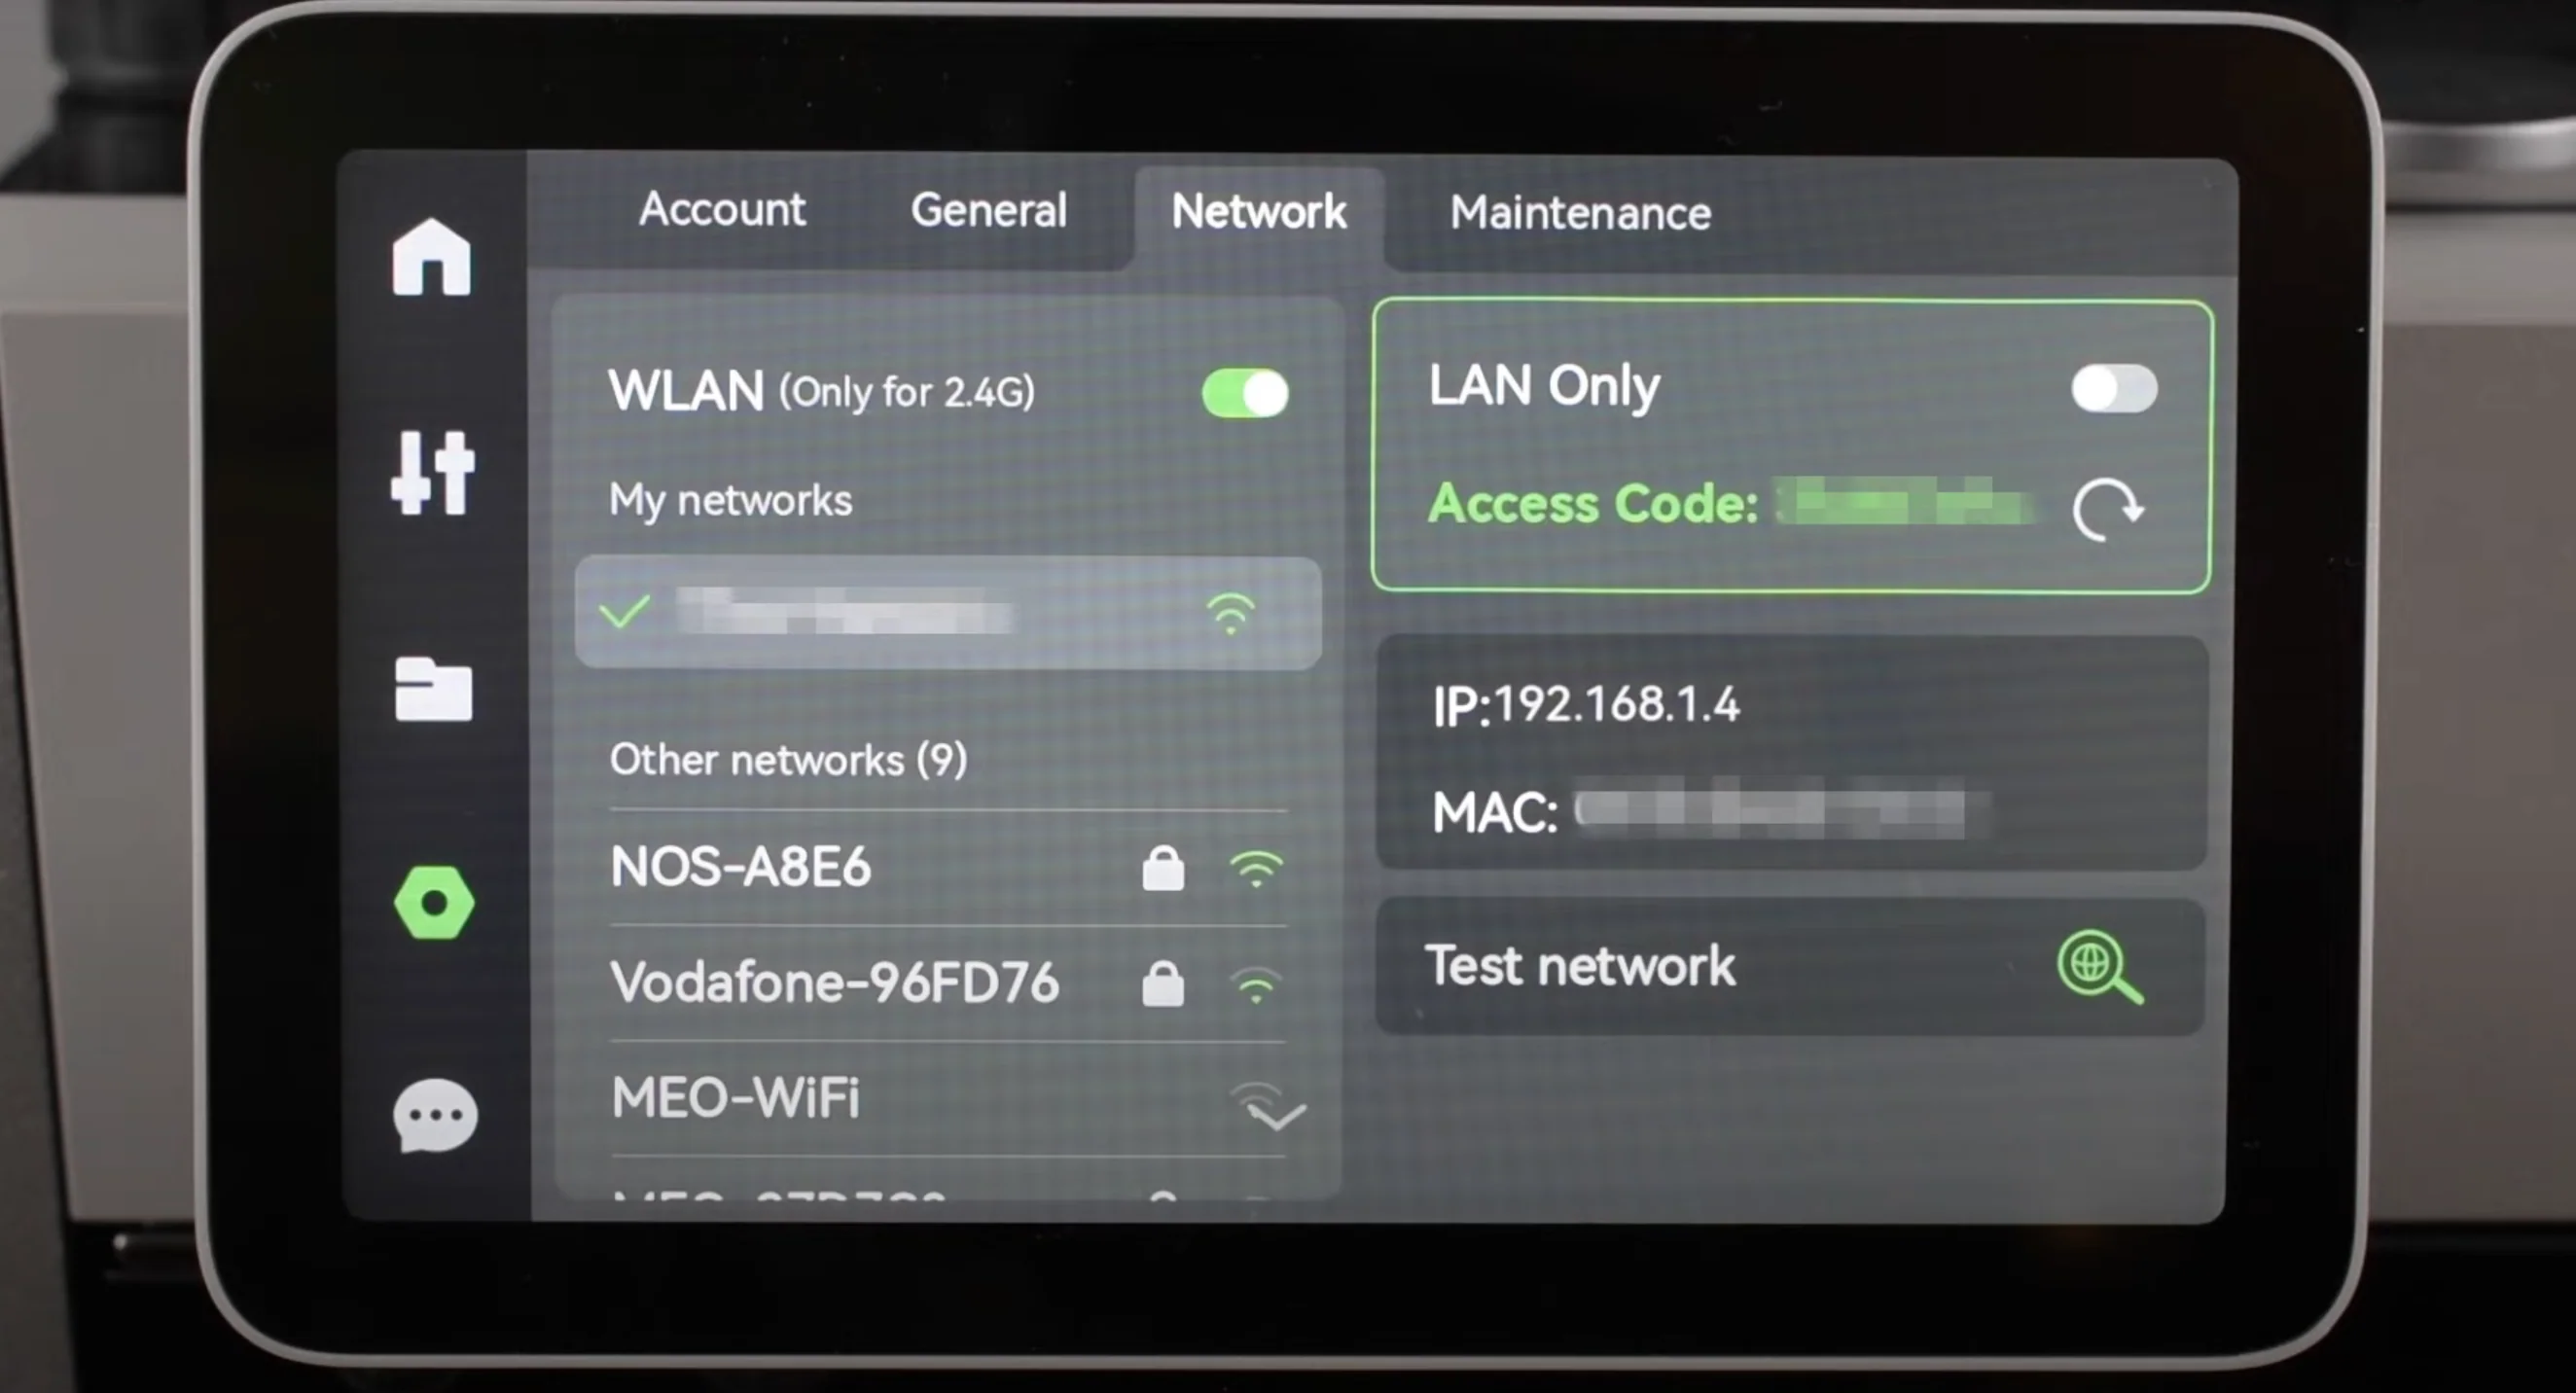
1. Printer IP Address
How to find it:
On your printer’s touchscreen, navigate to:
- Settings (gear icon)
- Network or WiFi
- Look for IP Address
Write down the IP address:
- Format:
10.0.0.252(example) - Usually starts with
192.168.x.xor10.0.x.x
- Format:
2. Access Code (LAN Access Password)
What is it? The Access Code is your printer’s local network password. It’s required for any device to connect to your printer.
How to find it:
- On your printer’s touchscreen:
- Settings (gear icon)
- Network or WiFi
- Access Code or LAN Access
- Write down the 8-character code:
- Format:
bc59c3d1(example) - Contains numbers and lowercase letters
- Case-sensitive!
- Format:
3. Device Serial Number
What is it? Your printer’s unique identifier used for the connection.
How to find it:
On your printer’s touchscreen:
- Settings (gear icon)
- Device or About
- Serial Number or SN
Write down the serial number:
- Format:
00M09C431202374(example) - Starts with
00Mor01Mor01P - 15 characters total
- Format:
Quick Reference Table
Fill this in as you gather information:
| Setting | Your Value | Example |
|---|---|---|
| Printer IP | _________________ | 10.0.0.252 |
| Access Code | _________________ | bc59c3d1 |
| Serial Number | _________________ | 00M09C431202374 |
| Client ID | (leave default) | bambu-led-controller |
Step 2: Configure Ryzer Connection
Now let’s enter this information into Ryzer:
Open Ryzer web interface:
- Navigate to
http://ryzer.localor your Ryzer IP address - Go to the Connection page
- Navigate to
Enter printer information:
Server (IP Address):
- Enter your printer’s IP address
- Example:
10.0.0.252 - No
http://or other prefix needed
Password (Access Code):
- Enter the 8-character access code
- Case-sensitive: use lowercase only
- Example:
bc59c3d1
Device ID (Serial Number):
- Enter your printer’s serial number
- Usually starts with
00M,01M, or01P - Example:
00M09C431202374
Client ID:
- Leave as default:
bambu-led-controller - Or customize if you prefer (letters, numbers, hyphens only)
Step 3: Test the Connection
Before saving, let’s verify the connection works:
Click “Test Connection” button:
- Ryzer will attempt to connect to your printer
- This takes 5-10 seconds
Watch for result:
- ✅ Success: “Connection successful!” message
- ❌ Failed: Error message with details
If Connection Succeeds
Great! You’ll see:
- “Successfully connected to printer”
- Green checkmark or success indicator
Proceed to Step 4 to save your settings.
If Connection Fails
Common error messages and solutions:
“Connection timeout”
Cause: Can’t reach printer at that IP address Solutions:
- Double-check printer IP address
- Ensure printer is powered on
- Verify printer is connected to WiFi (check printer screen)
- Ping printer:
ping 10.0.0.252(use your IP) - Make sure Ryzer and printer are on same network
“Authentication failed”
Cause: Wrong access code/password Solutions:
- Verify access code on printer (Settings → Network)
- Check for typos (case-sensitive!)
- Try copying/pasting the code
- Ensure you’re using the LAN access code (not Bambu Cloud password)
“Connection refused”
Cause: Printer not accepting connections Solutions:
- Restart printer (power cycle)
- Check printer firmware is up to date
- Verify LAN mode is enabled on printer
- Try different client ID
Step 4: Save Configuration
Once the test succeeds:
Click “Save Configuration” button
Wait for confirmation:
- “Configuration saved successfully”
- Settings are stored in Ryzer’s filesystem
Ryzer will now connect automatically:
- On every boot
- After network reconnection
- When returning from sleep mode
Step 5: Verify Connection Status
Let’s confirm Ryzer is receiving data from your printer:
Check Connection Indicator
On the Ryzer web interface Connection page:
- Green indicator: Connected and receiving data
- Red indicator: Not connected
- Yellow indicator: Connecting…
Start a Print (Optional)
Want to see it in action?
Start any print on your Bambu Lab printer
Watch for LED response:
- LEDs will change based on print status
- Indicates Ryzer is receiving print updates
Check Ryzer interface:
- Connection page shows current status
- Look for “Connected” indicator
Troubleshooting Connection
Connection Works But No LED Response
To verify it’s working:
- Check that Test Connection succeeds
- Verify connection indicator is green
Connection Drops After a While
Possible causes:
- Printer went to sleep mode
- Router dropping idle connections
- Weak WiFi signal
Solutions:
- Check WiFi signal strength of both devices
- Move devices closer to router
- Update Ryzer firmware (improved reconnection logic)
Can’t Connect to Printer After it Moves
If you moved your printer to a different network:
- Find printer’s new IP address
- Update Ryzer configuration with new IP
- Test and save
If printer IP changed on same network (DHCP):
- Check printer for new IP address
- Update Ryzer configuration
- Consider setting static IP on printer (router settings)
Multiple Printers
Want to connect to multiple Bambu Lab printers?
Currently, Ryzer can only connect to ONE printer at a time. To switch printers:
- Go to Connection page
- Enter new printer’s information
- Test and save
Future firmware may support multiple printers with LED strip zones.
Supported Bambu Lab Printers
Ryzer has been tested with:
- ✅ X1 Series (X1, X1 Carbon)
- ✅ P1 Series (P1P, P1S)